Bill DeBaun, Senior Director of Data and Strategic Services
Reading time: Nine minutes
A 2022 National College Attainment Network (NCAN) Conference presentation titled “Leveraging a Statewide, Cross-Sector Strategy to Increase FAFSA Completion” detailed a practice that every state should adapt or adopt as part of their Free Application for Federal Student Aid (FAFSA) completion strategy: emailing district and school leaders and staff about their FAFSA completion progress throughout the cycle.
The session in Atlanta, led by Troy Grant and Jessie Greene of the Tennessee Higher Education Commission offered an “overview of statewide strategies to increase FAFSA filing” and “best practices and strategies for increasing FAFSA filing.” Tennessee’s
statewide efforts are provided under the banner of the “TN FAFSA Frenzy.” The presentation is, frankly and simultaneously, a treasure trove, a roadmap, a checklist, and a
historical log related to the FAFSA completion strategies that have helped Tennessee finish first or second by percent of seniors completing for the past six years. For many states,
the presentation’s activities should also be a motivation and an aspiration.
The whole deck linked above is well-worth bookmarking and studying, but one practice in particular has been the college access version of an earworm since I heard about it.
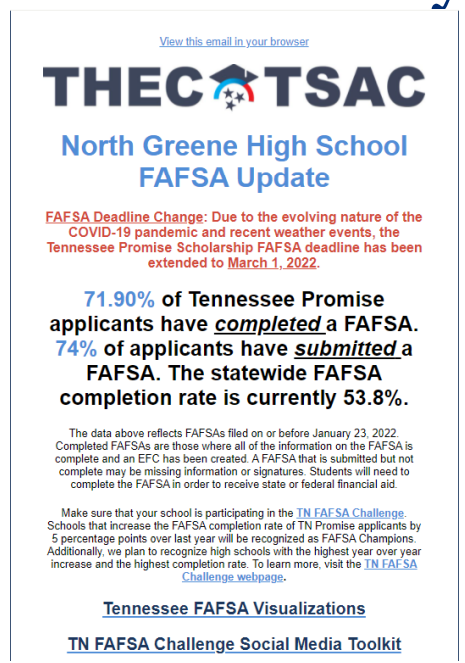
All the way down on slide 18 under the heading “FAFSA Communications,” Grant and Greene describe “emails to counselors, principals, and directors of schools.” The next slide documents what they mean: a “FAFSA Update” email that describes, among other
things a school’s levels of FAFSA submission and completion through a given point in the cycle and sets those percentages against the statewide FAFSA completion rate. The email concludes with linking to a FAFSA completion dashboard and a social media
toolkit.
“One of the cornerstones of FAFSA Frenzy is putting data in the hands of people who are working with students and who can use it,” said Leigh Ann Bodie, Director of Data and Compliance at THEC and data lead for the TN FAFSA Frenzy Initiative.
The data population the FAFSA Frenzy emails come from a Tableau visualization at CollegeforTN.org that shows the county- and high school-level FAFSA completion rates for
Tennessee Promise applicants. The Tennessee Promise provide two years of tuition-free attendance at a community or technical college in Tennessee, and FAFSA submission is an eligibility
requirement.
The data that are already in Tennessee’s FAFSA data visualization can be pulled out to populate FAFSA update emails. “We do email every week – principals, counselors, anyone whose emails we can get,” explains Bodie.
The emails use the popular MailChimp platform, which allows for mail merges much like connecting a database or spreadsheet to a Word file. To prepare a data file, the THEC team uses a high school’s
ACT code to connect the FAFSA completion data file to contact data in MailChimp. Contacts in the MailChimp list have their high school ACT code, so importing the FAFSA completion data and matching up an ACT code allows multiple contacts from the same
school to receive a FAFSA update email. For example, a school counselor, principal, and college access advisor at the same high school can all get their own email. Their school’s FAFSA completion data will be populated by ACT code, but each individual
has their own record for MailChimp. The screenshot below shows the data structure for the FAFSA completion data file that gets connected into MailChimp.
And here are screencaps of the MailChimp template with fields from the FAFSA completion data file as well as what it looks like when the email is populated to a recipient:
To see what the process for sending these emails out was like firsthand, I set up a Mailchimp account myself. The step-by-step process I used appears at the bottom of this blog post.
Among other things, the emails help schools understand how far along they are in making progress toward becoming a state FAFSA Champion through the state’s FAFSA Challenge. THEC’s website
notes “High schools will be recognized at the end of FAFSA season as leaders in FAFSA completion–both overall and year to year.” There are two ways for a high school to become a FAFSA Champion:
Increase their Tennessee Promise applicant FAFSA completion rate by five percentage points or more compared to the previous academic year as of the Tennessee Promise FAFSA deadline.
Have 90% or more of their Tennessee Promise applicants complete the FAFSA as of the Tennessee Promise FAFSA deadline.
Schools are essentially competing for bragging rights and the pride that comes along with them. FAFSA Champion high schools may be recognized via banners to be hung in the school, featured spots in THEC’s College Access and Success Newsletters, and even
trophies.
“We want it to be fun and motivating,” Jessie Greene, THEC’s Director of Communications and one of the presenters who put this strategy on our radar, noted via a phone call.
If it’s fun and motivating in Tennessee, and by the 67.3% statewide FAFSA completion rate they achieved by this past June 30, it surely is, then it can be fun and motivating in other states as well. Agencies and statewide organizations looking to bolster
their FAFSA completion rates should consider adding this approach to their toolkit. The communications channel to share FAFSA progress and resources could be invaluable for the forthcoming Better FAFSA implementation cycle and beyond.
Thank you, as always, to THEC for being a leader in the field and always willing to share best practices.
If you just wanted to read about the FAFSA email practice, you can stop here. However, if you're interested seeing the steps for implementing this, please continue reading.
Steps for sending out customized emails like THEC’s through MailChimp. (Note: there are many mass mailing services through which this can be accomplished. MailChimp is one that is well-known and much-used and also the one THEC uses, so it’s what I followed here. Presumably the process is similar elsewhere.)
Have questions? Email me at debaunb@ncan.org.
Sign up for a MailChimp account and choose the pricing that works best for your audience size (use your mailing list as a gauge).
Build Your Audience
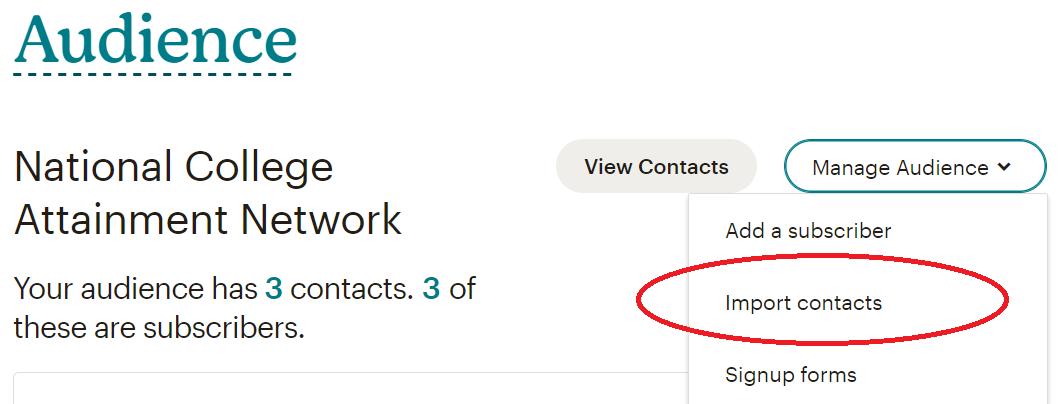
On the Mailchimp dashboard, click Audience, Manage Audience, and Import Contacts.
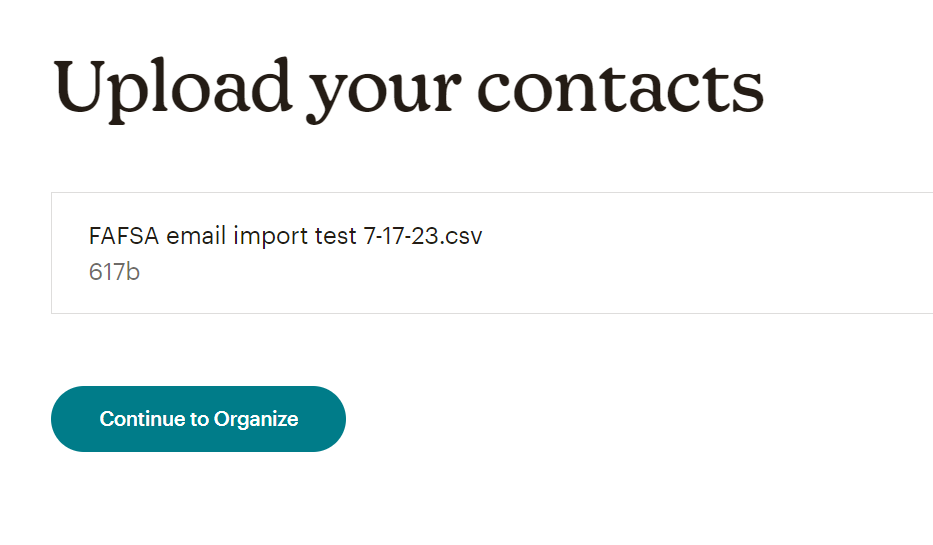
On the page titled “How would you like to add contacts?” click Upload a file and then Continue.
Upload your .csv file in the dialogue box and click Continue to Organize.
Choose the appropriate status for your contacts. MailChimp classifies these as either “Subscribed,” “Non-subscribed,” “Unsubscribed,”
or “Cleaned” according to how you got the contacts’ information. (I went with “Non-subscribed” here.) I also checked “Update any existing contacts” because if you’re going to re-uploading contact lists regularly, say weekly, biweekly,
or monthly throughout the FAFSA cycle, then uploading a new, corrected list will update previous contacts. You could also just upload only new contacts you’ve gained and add them to your audience on MailChimp. Either way works, it just
depends on the workflow you prefer. Click Continue to Tag.
On the “Tag your contacts” page, add any keywords pertaining to the contacts you just imported. If these are all school counselors, then “counselor” might be a good one. If they’re principals, then “principal,” and so forth. If the file contains
a mix of professionals or doesn’t have any obvious categories, then skip this step and Continue to Match.
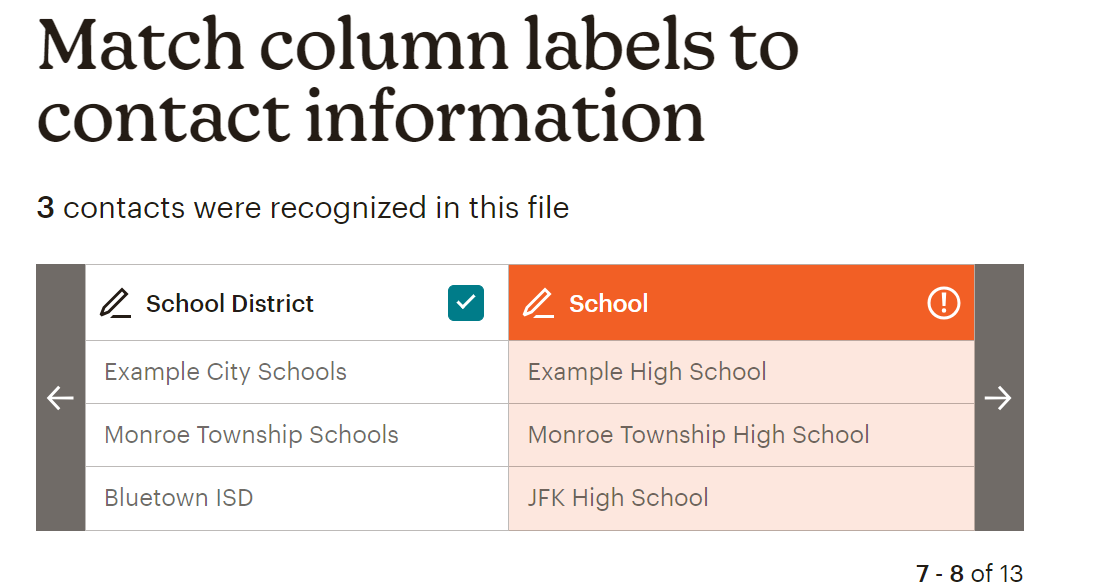
On the “Match column labels to contact information” page, you’re reconciling the columns from your spreadsheet to Mailchimp’s database. Use the left and right arrows to scroll across your columns. Columns with a green checkmark were imported
with no problem. Columns with an orange bad need some attention. Click on the exclamation point and use the dropdown to find the most sensible column label. Go through this for every column until there are no more orange columns. Then
click Finalize Import.
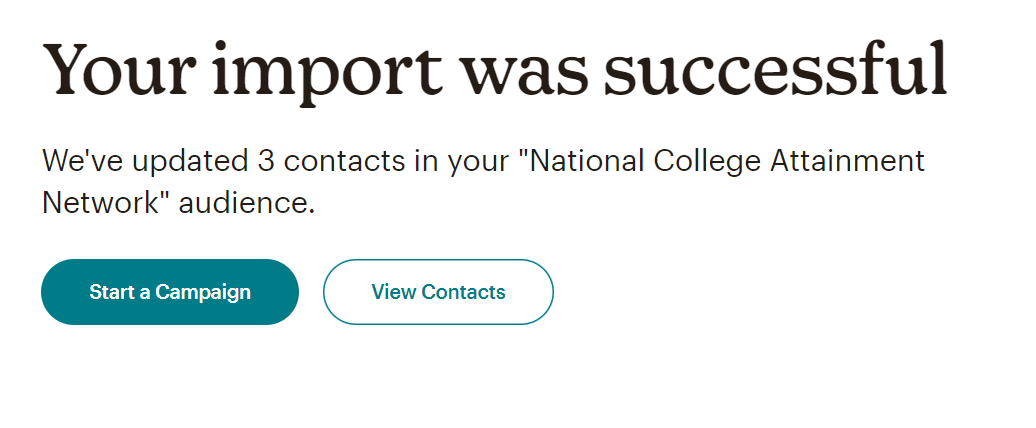
Review everything on “Review and complete your import.” When it all looks correct, click Complete Import.
Build Your Campaign/Newsletter
If you’re still on the Successful Import page, click Start a Campaign. Otherwise, from the Mailchimp Dashboard click Campaigns, All Campaigns, Create new.
There are a lot of ways to go from here design-wise. I didn’t get into all of that because I am not gifted with very good aesthetic vision. What I did do is click Design Email under “Regular email.”
Choose a template or design your own from scratch. (I went with “Minimal.”) Hover over the template you want and click Apply.
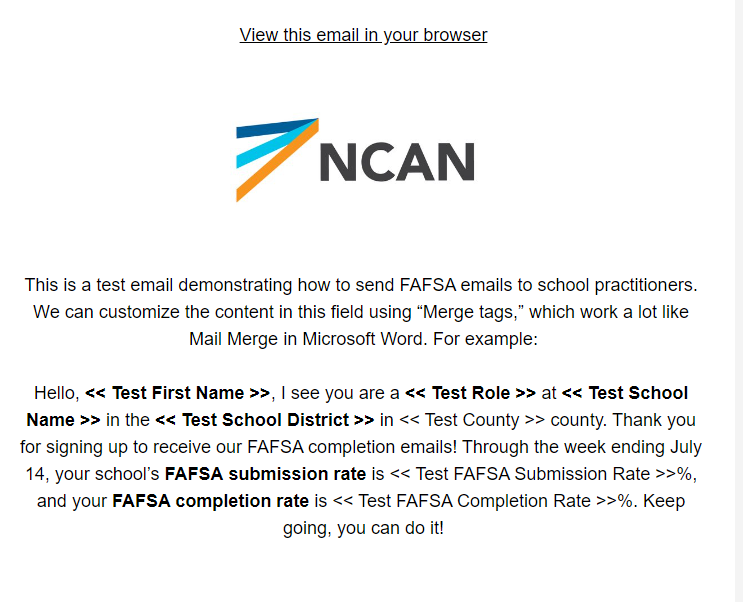
You can really go wild with details designing here. You can see in the below that I kept it pretty, well, minimal. Using “Paragraph” elements for text, you can start typing the message you want recipients to receive.
The important thing is to use what Mailchimp calls “Merge tags” to import your data fields into the message. This works a lot like Mail Merge in Microsoft Word. Scroll down until you find the field you want to insert. (You may have to zoom
out your window to see the top of the list of fields, as I did).
When you’re satisfied with your message, click Save and Exit.
On the next screen, Specify a From Email, Add an Email Subject and Preview Text, Specify a Send Time, and Resolve Any Errors. Also check that the number of recipients matches your expectations from loading
the audience.
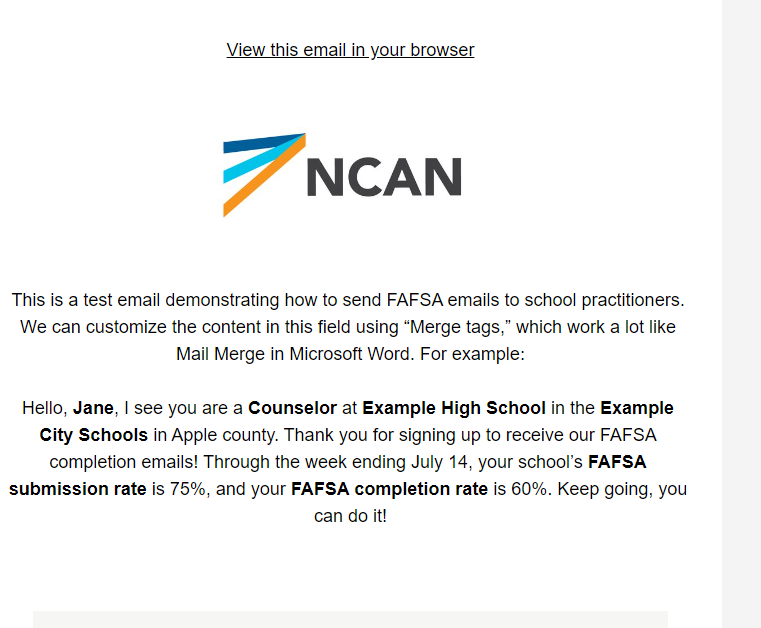
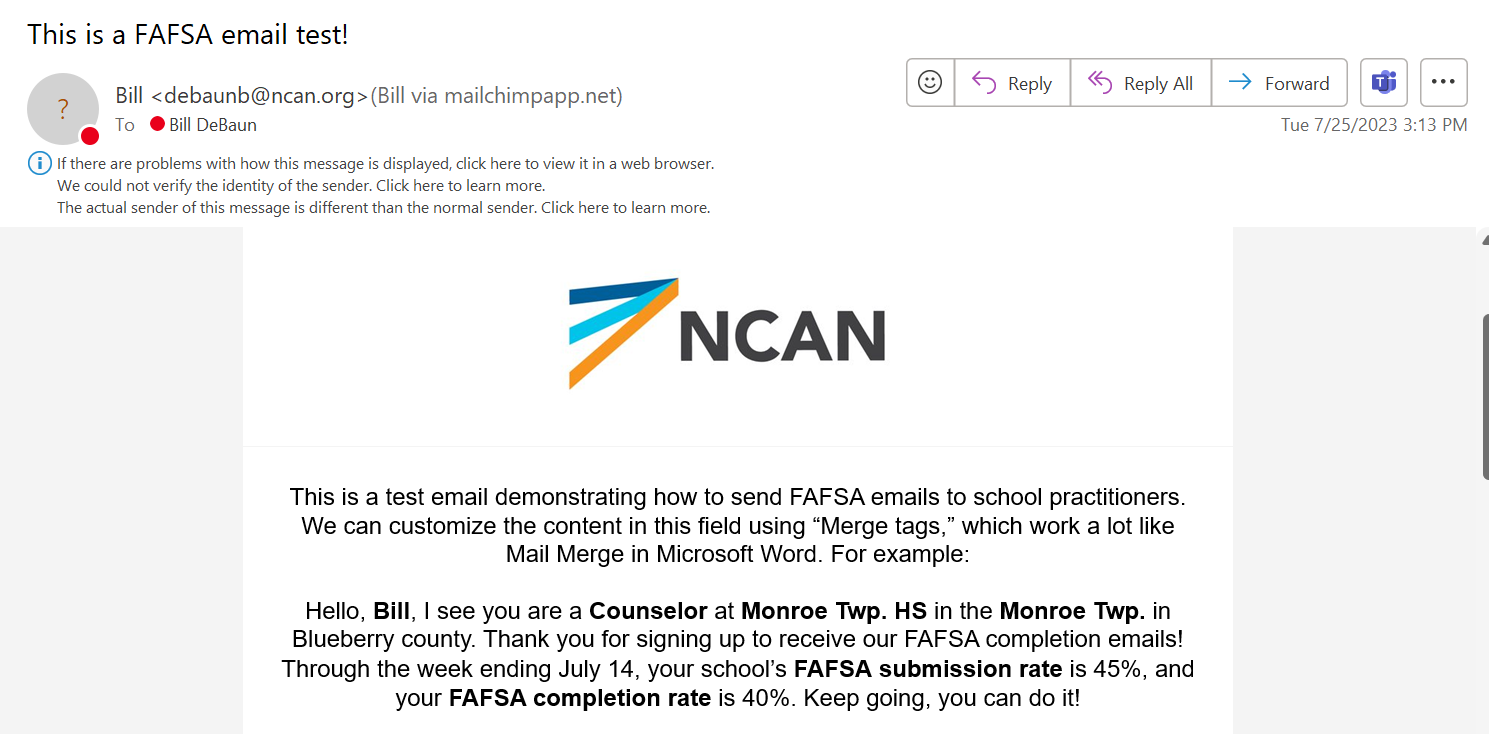
Use Preview mode (the magnifying glass on the top right-hand side) to check out your email before it goes out. The first screen shows your message with all of the Merge Tags you incorporated.
Clicking “Enable live merge tag info” on the right-hand side will help you see if the data is getting imported correctly or not. (The first time I did this I realized I needed to add % signs after my submission and completion variables.)
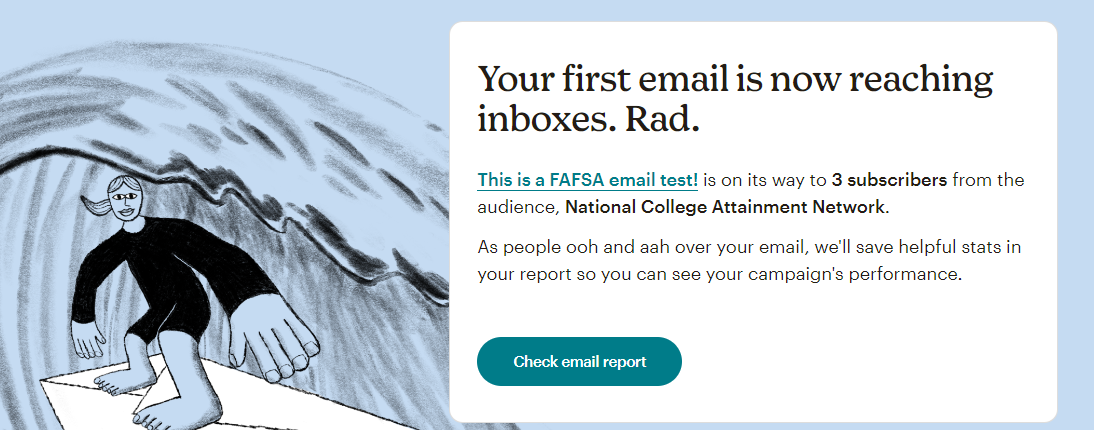
Send a Test Email to check out how your message looks in real life
Once everything looks good to go and you’ve checked, double-checked, and triple-checked for typos and have the right scheduled send time, click Send in the top-right corner.
You did it!
Now to Do It Again!
Update your audience using steps above to add, delete, or modify any contacts you’ve gotten in the period since your last email.
Back on the campaigns page, find your most recent campaign. With the down arrow next to Edit, click “Replicate.” Rename this for the date that this campaign will go out. This is the message you can build upon for your next campaign.
As a final note: I make no promises that this is the optimal way to do this process, instead I wanted to see for myself first-hand what it takes to send an email out. Using THEC’s .csv file (and fake data), I got a rudimentary email out the door in less
than an hour! Loading in an entire state’s contacts and matching high schools’ FAFSA completion data will definitely take more time, but with a few more hours and process, this could get really polished! Again, have questions or want to talk more? Email me at debaunb@ncan.org.